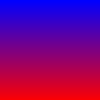
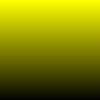
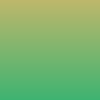

Figure 1: Simple 2-point linear gradients
In computer graphics, a color gradient (sometimes called a color ramp or color progression) specifies a range of position-dependent colors, usually used to fill a region. The colors produced by a gradient vary continuously with position, producing smooth color transitions
With version 2.0 of the Graphics32 library, color gradients are now possible in many different ways. There are hardly any limitations in the number of color stops or number of interpolation steps. Also for all gradients different wrap modes have been implemented (where possible). Furthermore several useful geometric distortions have been implemented such as linear, radial, conical, diamond, X, XY, Squared(XY). Finally some sparse point color interpolators have been implemented that can be used for simple mesh gradients.
Classic color gradients only use 2 colors with a linear transition from one color to the other color, as can be seen in Figure 1.


Figure 1: Simple 2-point linear gradients
The code, which is necessary to build the above gradients is very simple. In fact a linear gradient sampler is created and the values for each pixels are calculated.
var
  X, Y: Integer;
  Sampler: TLinearGradientSampler;
begin
  with Bitmap do
  begin
    SetSize(100, 100);

    Sampler := TLinearGradientSampler.Create;
    try
      Sampler.SimpleGradient(FloatPoint(0, 0), clBlue32, FloatPoint(0, 100), clRed32);
      Sampler.PrepareSampling;
      for Y := 0 to Width - 1 do
        for X := 0 to Height - 1 do
          Pixel[X, Y] := Sampler.GetSampleInt(X, Y);
    finally
      Sampler.Free;
    end;
  end;
end;
Another classical color gradient supported by Graphics32 (since version 2.0.0) is the circular gradient. A circular gradient is specified as a circle that has one color and a focus (the center of the circle) that has another. Colors are calculated by linear interpolation based on distance from the focus. The distance from the focus is mapped using a radius property
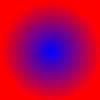
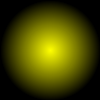

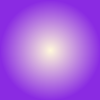
Figure 2: Simple 2-point circular gradients
The code, which is necessary to build the above gradients is very simple. In fact a linear gradient sampler is created and the values for each pixels are calculated.
var
  X, Y: Integer;
  Sampler: TRadialGradientSampler;
begin
  with Bitmap do
  begin
    SetSize(100, 100);

    Sampler := TRadialGradientSampler.Create;
    try
      Sampler.Center := FloatPoint(Width div 2, Height div 2);
      Sampler.Radius := Width div 2;
      Sampler.Gradient.StartColor := clBlue32;
      Sampler.Gradient.EndColor := clRed32;
      Sampler.PrepareSampling;
      for Y := 0 to Width - 1 do
        for X := 0 to Height - 1 do
          Pixel[X, Y] := Sampler.GetSampleInt(X, Y);
    finally
      Sampler.Free;
    end;
  end;
end;
As can be seen in Figure 2, the color outside the defined radius is clamped. While this might be desired and sufficient for typical cases, it is alsp possible to use other wrap modes. Figure 3 shows the differences between all the different wrap modes available.

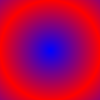
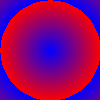
Figure 3: Different wrap modes: clamp, mirror, repeat
Please note, that the repeat wrap mode may cause rough and pixelized edges rather than smooth transitions, when the color starts to repeat. This can be corrected either by super sampling the gradient sampler (if a sampler is used opposed to a polygon filler) or by adding further color stops.
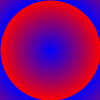
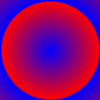
Figure 4: Fixing rough edges with wrap mode: repeat (supersampled, corrected using a 3-point gradient)
So far, the presented figures only featured 2 colors, but as it has already been mentioned with Graphics32 there are hardly any limitations in the number of color stops. Further color stops can simply be added at any time using the AddColorStop() method. Or the gradient can be defined directly using the method SetColors() method. Both are members of the TColor32Gradient, which is responsible to manage all color stops.
Copyright ©2000-2024 Alex Denisov and the Graphics32 Team - Graphics32 2.0 - Help file built on 18 Feb 2024